Sometimes your computer has lots of sensitive information it can bank information, financial documents, family photos, or some personal picture of you with your girlfriend ???? No doubt your data is secured, but it is always good to keep yourself on the safe side. Password protecting your folders having sensitive information add a necessary layer of security. Password protect a folder works like a virtual vault, which hides whatever is inside the folder.
How to Password Protect a Folder in Windows 10
Wondering how to create a password protected folder? It’s super easy to do. In upcoming lines, I’m going to teach possible ways to put a password on a folder.
1. Quick workaround (Batch Script)
Windows 10 with default settings, doesn’t allow users to set a password on a file, but with a quick workaround you can to do. All you need to do is write a batch script using a notepad. Here’s what you need to do:
- To get started you need to head over to the folder on which you want to put a password. For this tutorial, I’m creating a new folder named as ‘Test.’
- Open the folder by making a double click. Inside the folder, you need to create a new text file in which you need to type the code.
To create a text file, make right click on the empty space inside the folder and select New -> Text Document.
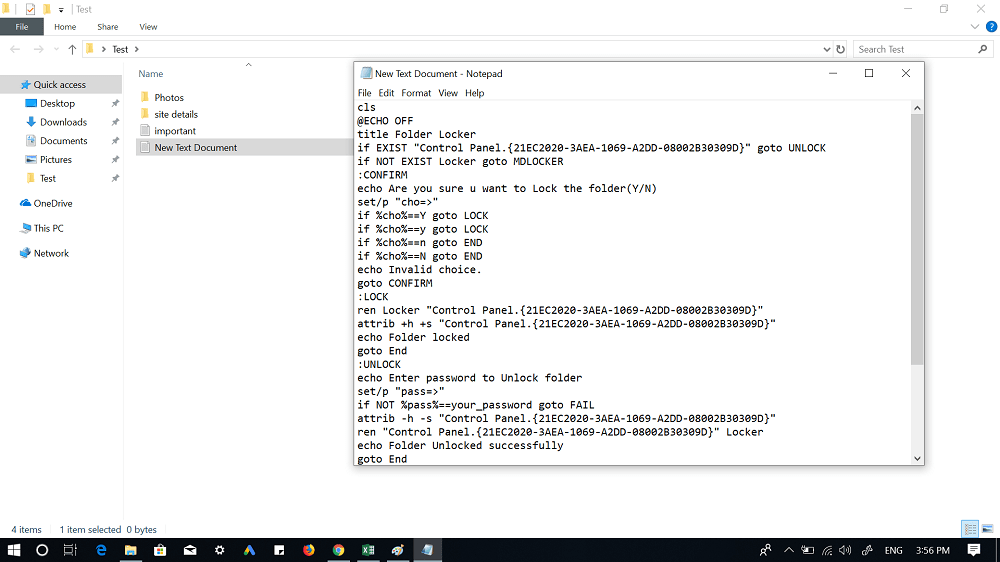
Inside text document, you need to copy-paste the following code: To set a password, you need to replace your password with “Your Password” in the next line:
After adding a password into the code, you need to save the file. For that, click on the File -> Save As. You will be asked to give a name to this file. Name it whatever you want, Locker sounds fine to me.
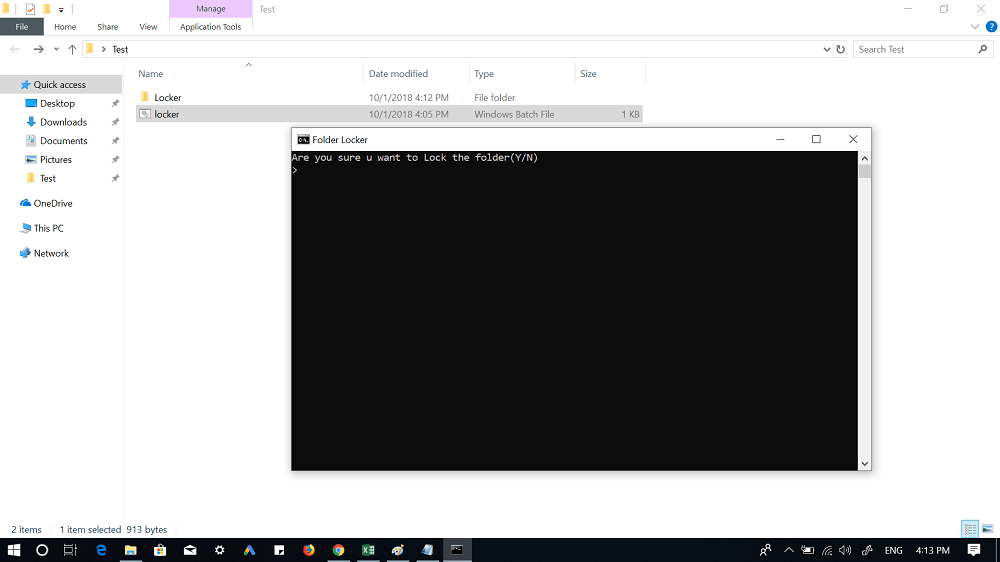
Next, save the file with .bat extension. Since I’m naming it Locker so it will look like “Locker.bat.” Now, you need to double click on the BAT file which you created inside your folder using the above steps. This will create a new folder with the same name. This is going to be your password protected folder.
Copy-paste all your essential documents inside this folder. Once done, again double click on the Locker.bat file. A quick command prompt window will launch asking for your permission.
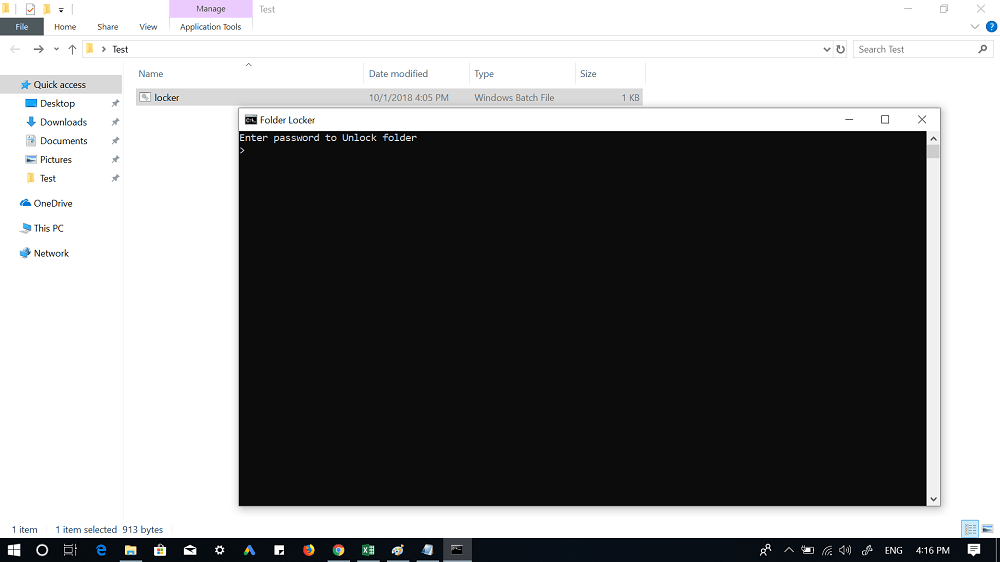
Type Y and hit enter. And your folder will instantly disappear. Now you might be wondering how to get the password protected folder back, right? Double click on the .bat file again. You will be asked to enter the password, and if you type the correct password, it will appear.
2. Zip Folder Lock
In the above workaround, we used a default text editor that comes preinstalled in every person of Windows OS. In this method, we will make use of popular file archiving tool named as 7-zip Usually, we use 7-zip to extract the file and unzip the folder. The good thing about this program is that also provides an option to password protect folders. Here’s what you need to do to password protect a folder:
- Download and install 7-zip using this link.
- Launch 7-zip File manager on your computer.
- Next, navigate to the folder for which you want to add a password and then click on the Add option available on the upper right corner.
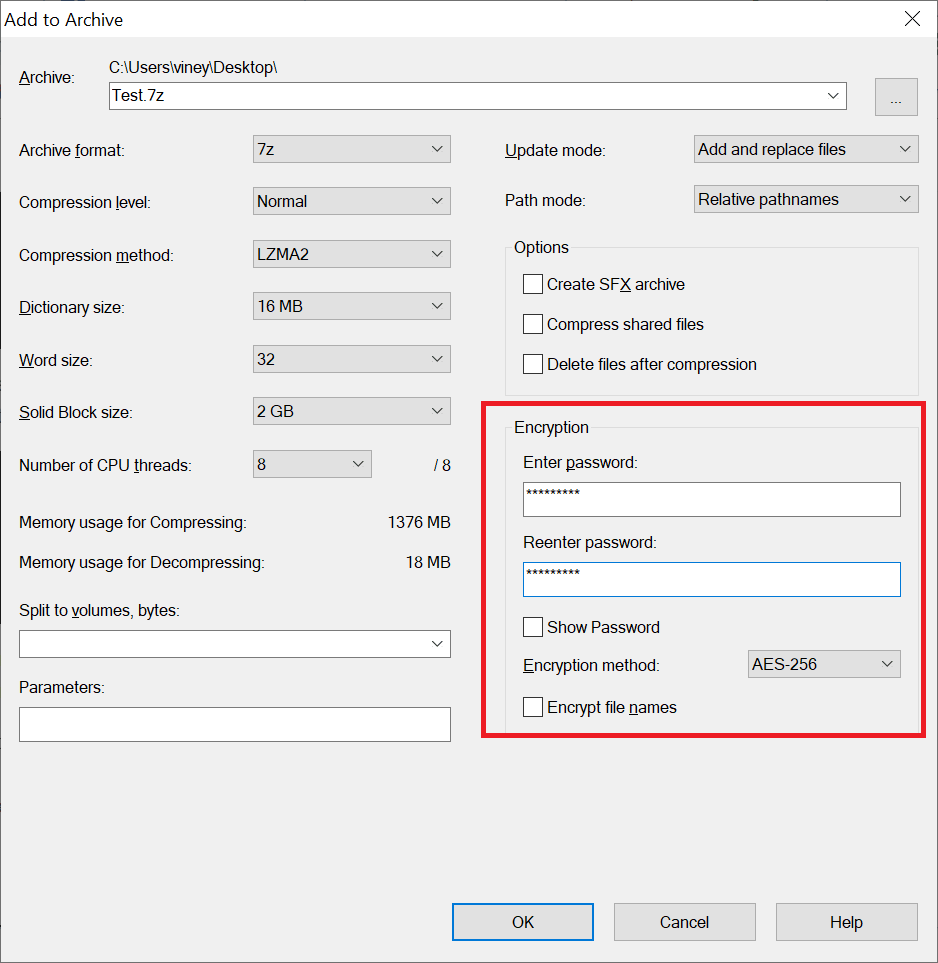
This will open “Add to archive” window. Here, you need to head over to ‘Encryption section‘ and enter the secure password of your choice. Once you’re done, click on the OK button. In the same folder location, you will get a zip file of the same name (original folder).
As you have created a password protected zip file, you can move the original folder to trash (delete it). To extract the zip file, it is not mandatory that you need to a 7-zip program. You can use any archiving tool that supports zip file to extract your password protected folder.
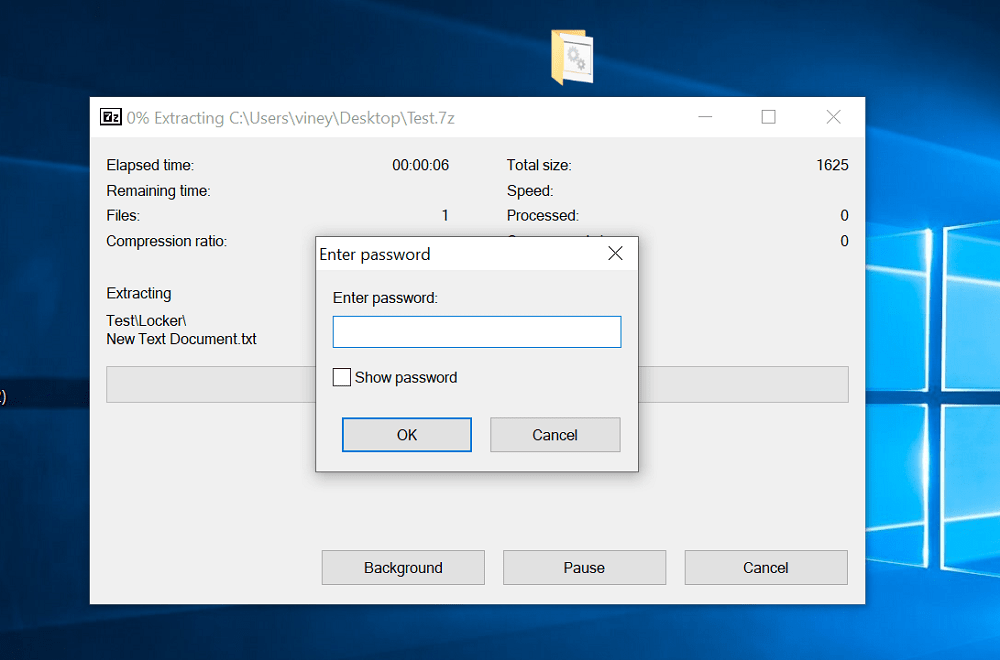
At the time of unzipping, you will be asked to enter the password. Enter the correct password, and you will be able to access the files inside the folder.
3. Use Hide files and folder feature
With the method discussed above, you learn how to create a password protected folder. With this method, you can add a layer of security by hiding the folder. Here’s what you need to do:
- Right click on the folder which you want to hide and select Properties.
- Next, head over to Attributes section and tick the box for Hidden.
When the “Confirm Attribute” dialog box opens up, make sure “Apply changes to this folder, subfolder, and files.” Click on the Apply button and then OK. Your folder will disappear in no seconds. Now you might be wondering, how to view it back, right? No worries, do this: 3. In Windows File Explorer, you need to head over to View tab; you will find the option in the ribbon. Here, you need to tick box for “Hidden times“. This will instantly bring back the original folder.
In case, you want to unhide the folder, then again launch the Folder Properties and uncheck the same option hidden option. That’s it! These are some of the easy workarounds which you can use to create a password protected folder. It is upto you which method you want to employ. Find this my blog post how to put a password on a folder in Windows 10 useful? Is there any other method you’re using to put a password on a folder? Feel free to share your thoughts in the comments.