If you landed on this page, then you definitely have the following questions i.e.
What is the Memory leak issue in Windows 11What triggers the memory leak issue in Windows 11How to Fix memory leak issue in Windows 11
Or there might be other questions, that you can share with us in the comments. In this blog post, we will share everything you need to know about. So keep reading. A memory leak issue occurs when the process running on your PC allocates memory (RAM) from paged or non-paged pools but doesn’t free the memory even after the process is closed. As a result, the system pool of memory is exhausted over time, causing the system to slow down and fail. Windows 11 users face different memory leak issue which includes, Memory Leak, Low Memory, High RAM Usage, Bad RAM, and even other RAM issues. No matter what Memory or RAM issue takes you to this page, we will share possible solutions on how to fix them. So let’s get started
Check Memory leak issue in Windows 11
Before you start checking the solution discussed below in this blog post, it is possible to know or find out if you’re a victim of a Memory leak issue in Windows 11. Here’s how you can find out: Click on the Search icon and type resmon and when the Resource monitor app appears in the results, click to open it. In the Resource monitor switch to the Memory tab. Under the Physical memory section, check Standby. Now close all apps including File Explorer. After doing this, Standby memory should come down. If nothing happens or Standby memory is still high, then you’re a victim memory leak issue in Windows 11. Now, you should try the solutions suggested below in this article.
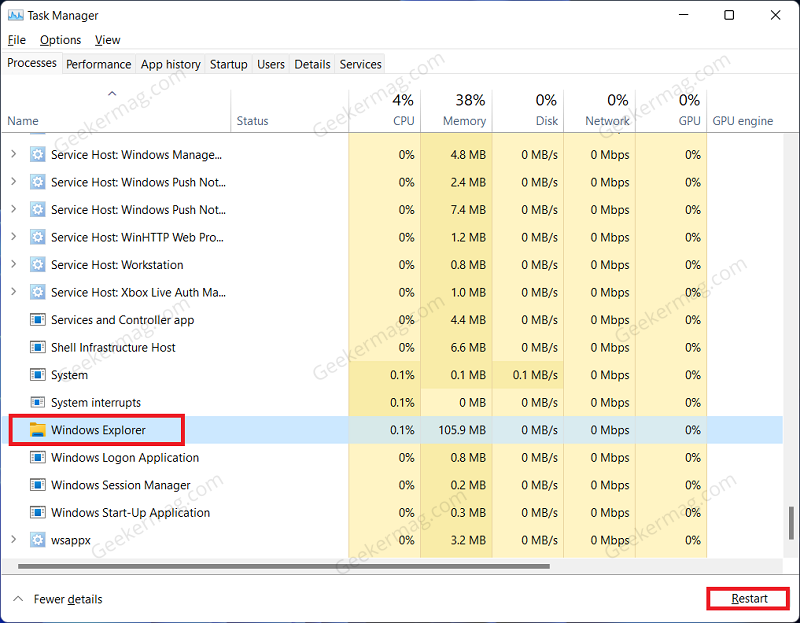
Restart Windows Explorer
Most of the time, when you restart file explorer in Windows 11, the memory leak issue is fixed automatically. So before doing anything, try this solution. Press Ctrl + Shift + Esc to open the Task Manager. Select the Windows Explorer service in the Processes tab and click on Restart. Once done, you should no longer face the issue.
Close All Apps And Browser Tabs
If lots of applications are opened on your PC, then try to close the ones that you’re not using and that idle for a long time. Apart from that, if a particular browser is a reason behind the memory leak issue, then try to close unnecessary tabs opened on your browser. Although a browser like Edge comes with a sleeping tabs feature, there are other browsers that lack this feature. After making these changes, restart your PC and check if this fixes the issue or not.
Update Windows
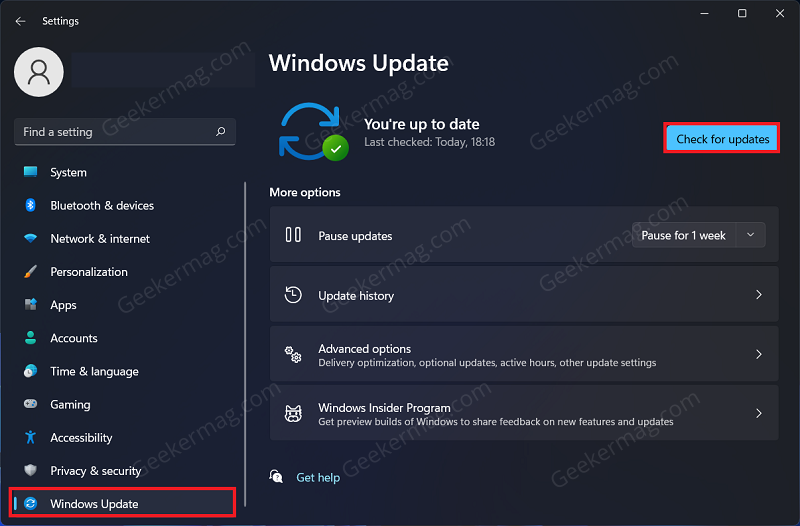
Sometimes when you install a recent update released by Microsoft. It is possible that there’s a conflict between two programs, processes or drivers, or anything that consumes RAM. As a result, there’s a possibility of memory issues occur. So keep checking updates and known issues released by Microsoft. The company frequently releases bug fixes. If you’re affected, try to install a particular update. Also, make sure, your system is up-to-date, if not this could be another reason why you may encounter an issue with RAM. Open the Settings app on your PC by pressing the Windows + I key combo. Head to the Windows Update section and then click on Check for update option. Now, download and install all the updates your PC finds and the issue should be fixed.
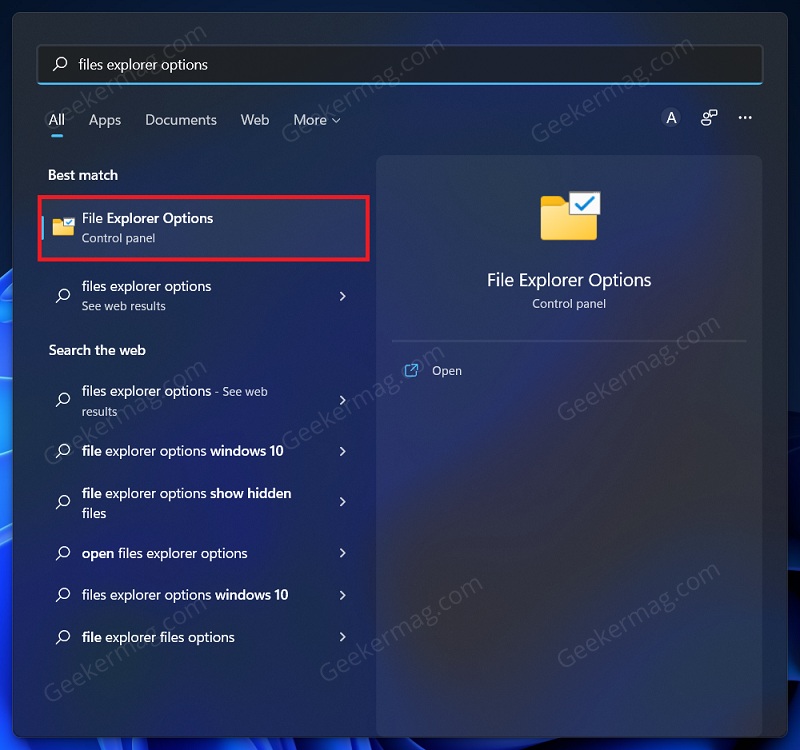
Launch Folder Windows In A Separate Process
Another thing you can try to fix the memory leak issue in Windows 11 is by running a File Explorer in a separate process. According to various reports from users, this workaround helped a lot. So its worth trying: Press the Windows key combo and search for File Explorer Options. Select the first option to open it. Head to the View tab, and check the checkbox for Launch folder windows in a separate process. Click on Apply and then on OK to save the changes.
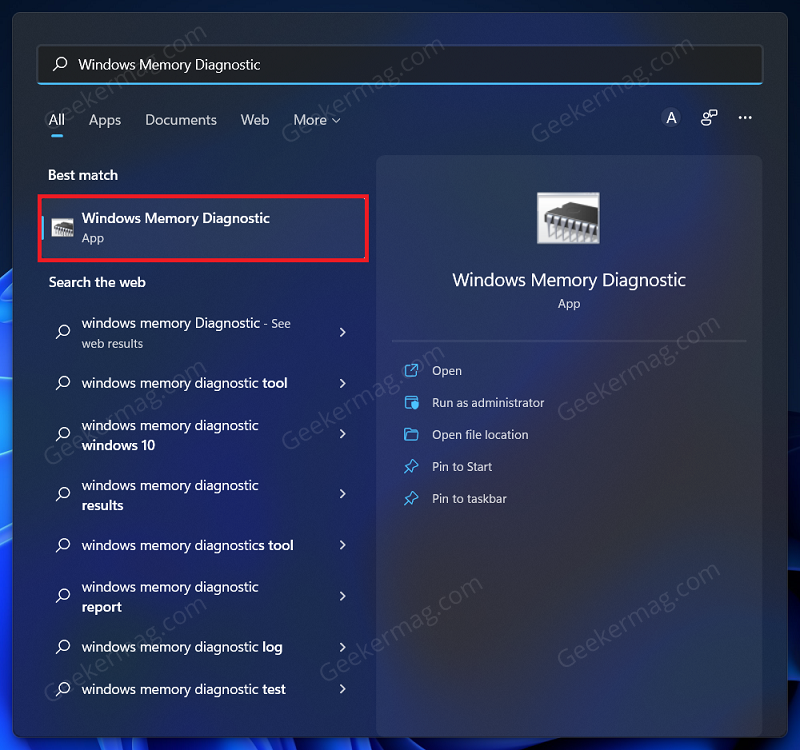
Run Windows Memory Diagnostics
You should perform Windows Memory Diagnostics on Windows 11 PC (Link has steps for Windows 10, that work in Windows 11 as well.)to fix any issue related to RAM. To run Windows Memory Diagnostics, follow the steps given below- Open Start Menu, search for Windows Memory Diagnostic, and open it. Here, click on Restart Now and check for problems. Your PC will restart now and this will fix any issue you face with your RAM.
Disable Startup Programs
Sometimes Startup programs could be a reason behind memory leak issues in Windows 11. So it’s recommended to disable the startup program if you don’t want. Especially the ones with high impact. Here’s how you can do that: Open Task Manager on Windows 11 PC by pressing the Ctrl + Shift + Esc key combo. Head to the Startup tab in the Task Manager. Select the programs with High startup impact which are not required during startup, and click on Disable. You can disable other as well, if not required Once done, restart your PC and this should free up a lot of your RAM.
Increase Virtual Memory
When you have less physical memory on your PC, then it’s highly possible you face a memory leak issue in Windows 11. In this, you can increase virtual memory to get some boost, although you can’t rely on this solution. We have a post on how to increase virtual memory in Windows 11, try the steps discussed and after making the changes, check if this fixes the low RAM issue or not. By following the above steps, you will be able to fix the memory leak issue on Windows 11.