Check out this all-inclusive guide to know more about the new features and how to use them efficiently on your iPad. Let’s start with the compatibility quotient!
Which iPads are compatible with multitasking?
iPads running iPadOS 15 will support all multitasking features. Here’s the list of compatible models.
iPad 5th generation and lateriPad mini 4th and 5th generationAll models of iPad Pro iPad Air 2 and later
However, a few old iPads support limited features like Slide Over and PiP Mode:
iPad Air iPad mini 2 and 3
If you need help identifying your iPad models, check out this guide.
Multitasking features available on iPads
An iPad majorly comprises of the following multitasking components:
Multitasking Menu – Incorporated in iPadOS 15, the three-dot button placed on the top of apps acts as a menu to enter/exit multitasking options. Split View – A self-explanatory term, it divides the iPhone screen into two halves. You can use two different or similar app windows together.Slide Over – While one app remains in full-screen, a second window hovers over it. You can slide it in or out as needed. Center window – In iPadOS 15, you can open a quick preview window centered on the screen. Although, it currently supports only limited functionality:NotesEmail messagesMessage conversationsShelf – In iPadOS 15, the multi-window shelf lines up all open windows of an app at the bottom of the page for quick access. You can switch, close, or open a tab with just one tap. Picture in Picture mode – Dubbed as the PiP mode enables you to watch videos in a floating window above other apps/sites.App Switcher – iPadOS 15 has given more power to App Switcher. You can create Split View spaces and view all Slide Over apps.
Turn on or off multitasking features (iOS 14)
How to reveal the Multitasking Menu (iPadOS 15)
In addition to this, you’ll also see the Shelf at the bottom if multiple windows of an app are active.
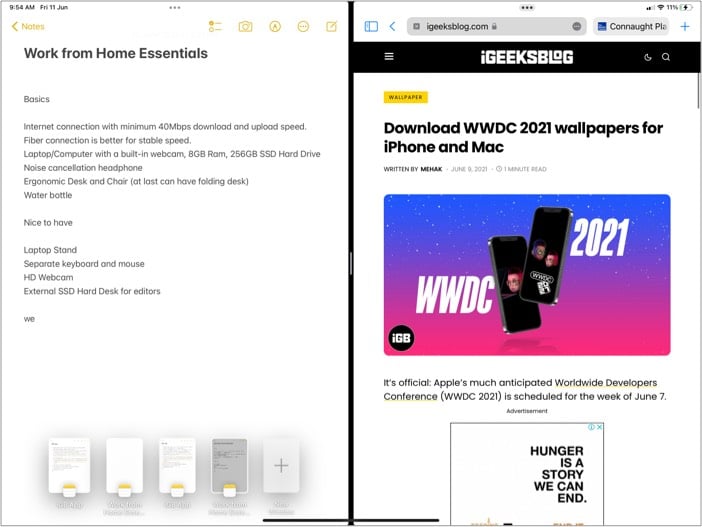
How to split screen on iPad using Split View
I. For iPadOS 15
II. For iPadOS 15 and earlier
Adjust Split View settings on iPad
Switch appsManage the window sizeReverse app positionsHow to close Split ViewHow to enter Split View via App Switcher
Switch apps
For iPadOS 15 – Swipe down the app you want to replace. The remaining app window will automatically slide towards the edge; now, choose the other app.For iPadOS 15 and earlier – Hold, drag, and drop the app over the app you want to replace.
Manage the window size
Touch the app divider (small vertical line) and drag it to the left or right to adjust the window size.
Reverse app positions
Hold the three-dot icon, drag, and drop the window over the other app. The second app will move left or right, making space for the first one.
How to close Split View
For iPadOS 15 – Tap the three dots at the app’s top and select the Full Screen (first option).For iPadOS 15 and earlier – Tap and drag the app divider over the other app you want to close.
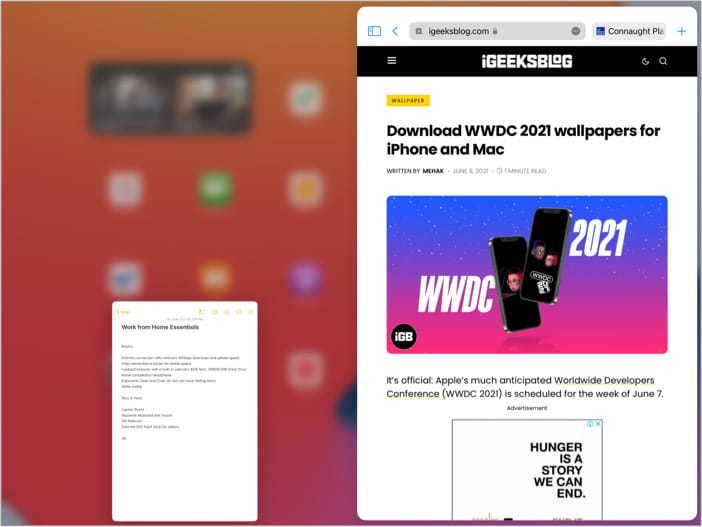
How to enter Split View via App Switcher
What’s more? You can also
Switch Split View apps – Drag and drop the app over the other app. Close an app in Split View – Touch and swipe up the app.
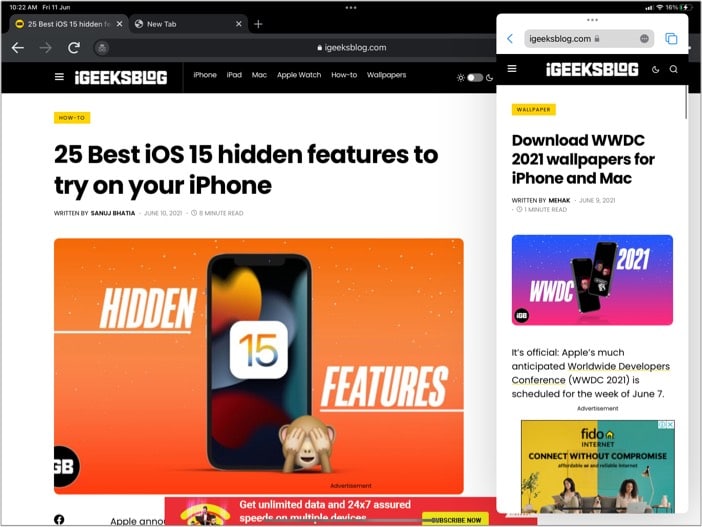
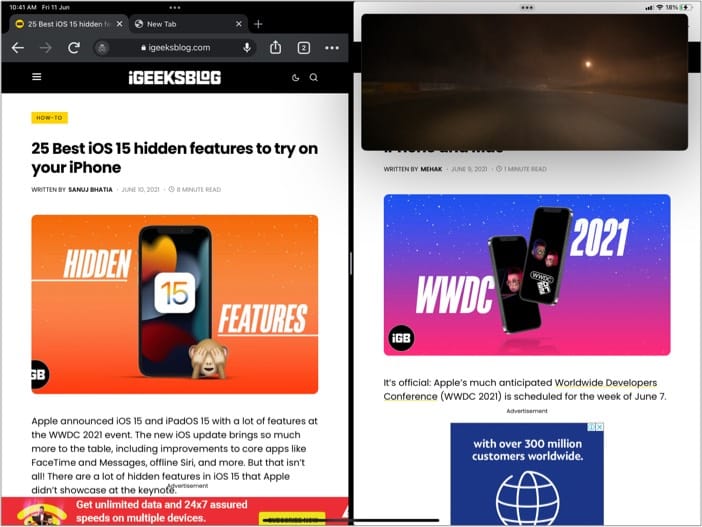
How to enable Slide Over on iPad
I. For iPadOS 15
Tada! Just like that, the initial app will float over the second app.
II. For iPadOS 15 and earlier
Note: Don’t drag the app to the corners; drop it before the black screen appears, or else it will enter Split View.
How to adjust Slide Over settings on iPad
Reposition the Slide Over windowHide the Slide Over appOpen a different app in Slide OverSwitch between apps in Slide OverChange the background app
Reposition the Slide Over window
Place your finger on the three dots/small vertical line at the top of the Slide Over app screen and drag it to the left or right.
Hide the Slide Over app
Touch the edges of the floating window or the three-dots/small vertical line and give a slight push towards the screen’s edge, whether it’s placed on the right or left. To bring back the Slide Over window, swipe in from the screen’s edge.
Open a different app in Slide Over
The Slide Over window can boast multiple apps at a time. The mantra here is to drag and drop the next app you want on the floating window.
Switch between apps in Slide Over
Swipe left or right on the horizontal line at the bottom to access the next app. You can swipe up from the bottom or use App Switcher to view all Slide Over windows currently active. And to close an unwanted app, swipe up the app window.
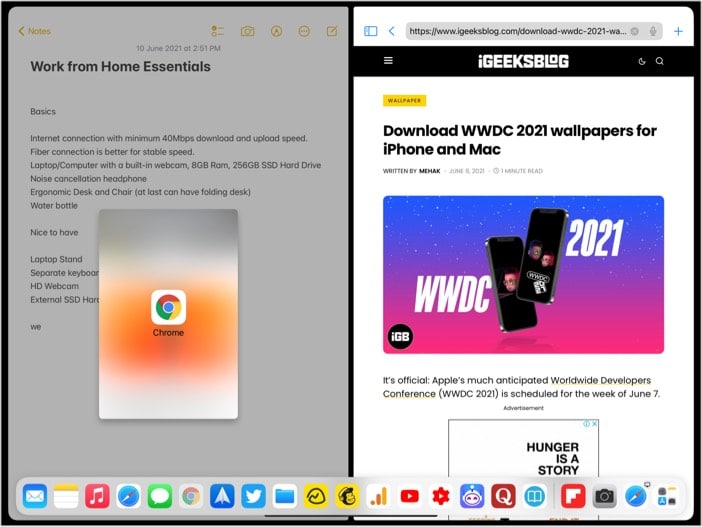
Change the background app
If you want to maintain the Slide Over window while changing the background full-screen app, bring up the dock and tap the new app.
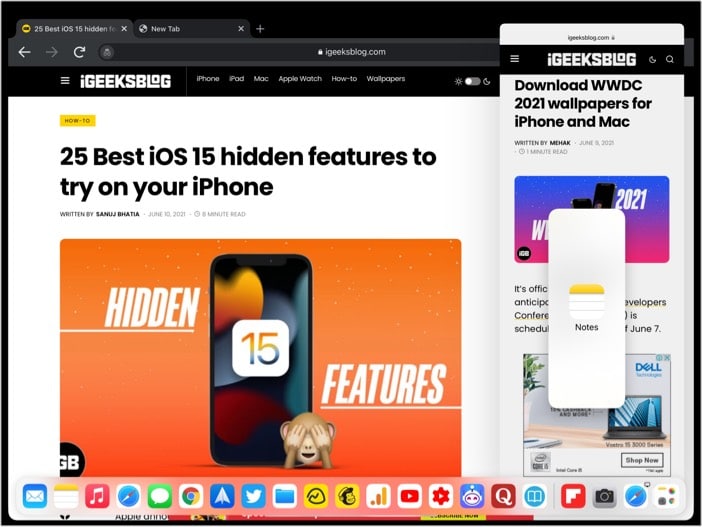
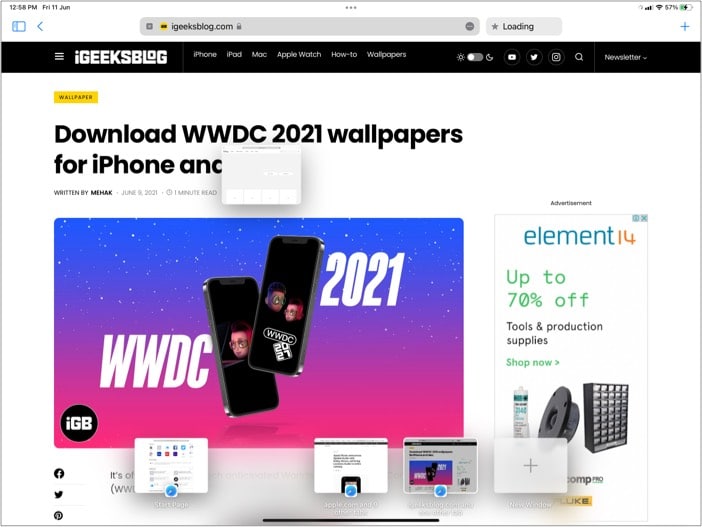
Use the Center Window feature on iPadOS 15
This feature works even when Split View or Slide Over is active. However, it is designed only for previews and moves away (hide in the Shelf) when you press anywhere else on the screen.
How to switch between various views
A masterstroke of iPad multitasking is that you can switch between various modes with just a tap. Let me show you how it’s done.
Turn Split View into Slide Over
For iPadOS 15 – Tap Multitasking Menu (three dots) and select Slide Over (third option) iPadOS 14 and later – Hold the three-dots/small vertical line to drag and drop the window anywhere on the screen.
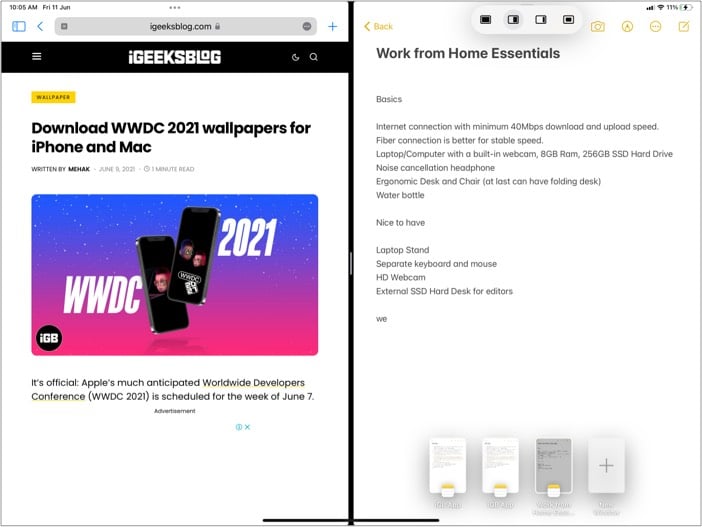
Turn Slide Over into Split View
For iPadOS 15 – From the Multitasking Menu, select Split View (second option). The current Slide Over window will instantly enter half-n-half mode. For iPadOS 14 and later – Hold the three-dots/small vertical line and drag the Slide Over window to any edge until a black window appears; drop the window here.
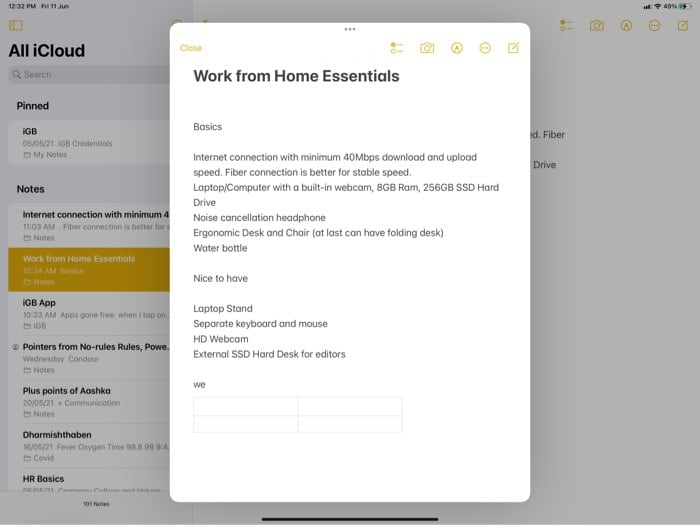
Turn Split View or Slide View into center window
There are two ways to do so, but remember this feature is available to a limited set of apps.
Multitasking Menu – Tap the three-dot icon and select the center window (fourth option), if available.Drag and Drop – Place your finger on the three-dot icon, drag, and drop it to the screen’s center.
To move back from the center window to Slide Over/Split View, just reverse the above steps.
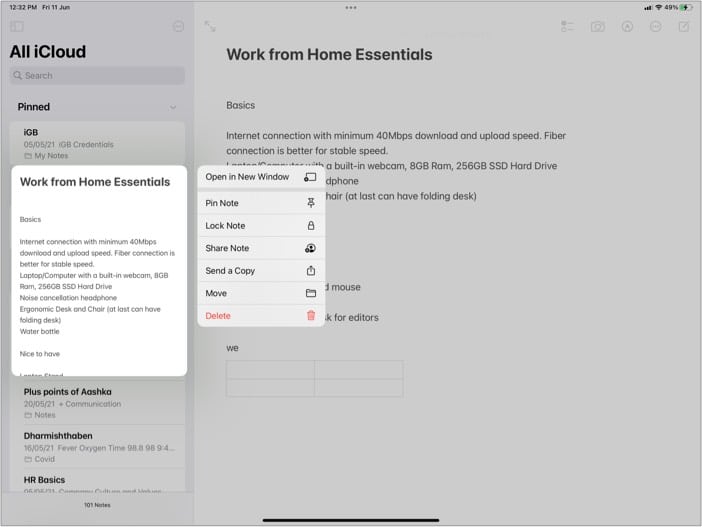
How to use Shelf in iPadOS 15
When you call upon the Multitasking Menu, the Shelf appears at the bottom. It helps you access all active windows for an app. A feat previously managed only through the App Switcher. In addition to that, here’s what more you can do with the Shelf:
Open a new app – Tap the + icon to add another app window into the mix. Switch between windows – Tap the window you want to switch to. Close windows – Swipe up the window you want to close down.
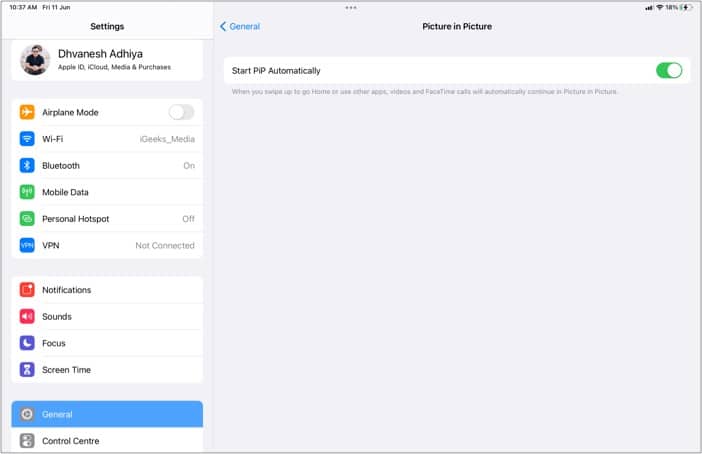
Use Picture in Picture mode on iPad
Continue playing your videos or FaceTime calls while continuing your work, all thanks to PiP mode. But before we continue, let’s first ensure that PiP mode is enabled. Go to Settings → General → Picture in Picture → Toggle on Start PiP Automatically. When you play a video or attend a FaceTime call, swipe up to go to the Home screen. The video will start playing automatically in PiP mode, even over the Split View/Slide Over. Note: You can increase or decrease the window size, hide it, or go back to the full-screen video. Our separate guide on using YouTube in PiP on the iPhone and iPad will tell you more about these things.
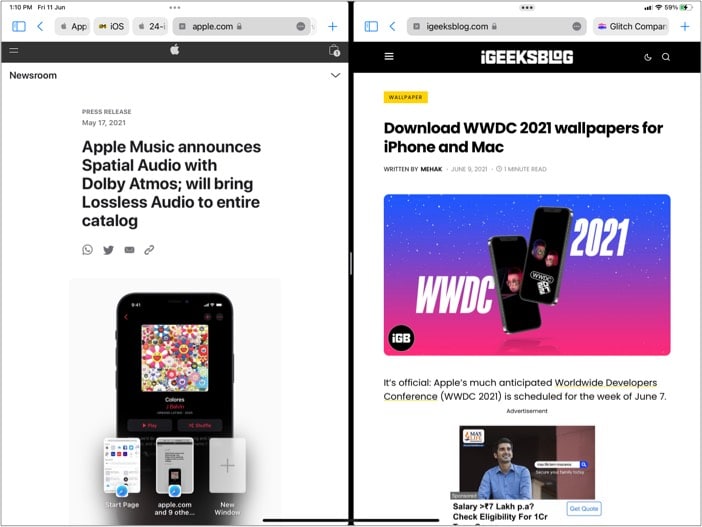
How to open multiple windows of the same app on an iPad
Though added in iPadOS 13, iPadOS 15 has further simplified running multiple windows of the same app. When one of the app windows is opened, either
Invoke the Multitasking Menu – Select the Split View or Slide Over option and tap the same app icon. Invoke the Dock – Hold, drag the same app icon and drop it on the screen to enable Split/Slide Over.
Use drag and drop between apps on iPad
One of the best use cases of having multiple apps/windows open simultaneously is that you can easily drag and drop the content. For instance, you can drag text from Safari to Notes, pictures from the Photos or Files app to Messages, or calendar events to the Mail app, and so on. You’ll notice a green + badge on the top-right corner; this means the app supports the drop. To select multiple images (or files), touch and slightly drag the first one. Next, tap other images to select them. A green badge will tell you about the number of selected items. After this, drop them in the other app.
Additional features to help you in iPad multitasking
While all these features make the basis of multitasking on the iPad, many features further enhance the capabilities.
Keyboard and trackpad shortcuts – Who doesn’t love shortcuts? An iPad offers a variety of trackpad and mouse gestures and keyboard shortcuts.They ensure that you don’t have to repeatedly touch the iPad screen, saving time and effort.Focus mode – iPadOS 15 brings in a relaxed focus-centric mode, available in various options like work, personal, reading, etc. Along with notification management, it lets you customize Home Screen for specific modes. So, when in a multitasking zone, you can limit the apps on-screen to only the ones you’ll need. Quick Notes – An iPadOS 15 unique feature to enhance your productivity. Build to make note-taking swifter; this window will prop up on your command. You can add text, handwriting, links, Safari highlights, tags, and mentions. Consider it an extension of drag and drop to Notes app, but without actually opening the app. Let’s see in detail how to use Quick Note on iPad (iPadOS 15).Live Text – While not a multitasking feature, it can come in real handy. The built-in OCR-reader iPadOS 15 feature allows you to recognize text from images or live scenarios.The cherry on top of the cake is the Text from Camera feature. You can copy and use text directly from the camera in apps like Messages, Notes, Safari, Mail, and more.Universal Control – Another gem from iPadOS 15 treasure chest. You can control your Mac and iPad with a single keyboard and mouse or trackpad. Now isn’t that a masterstroke for professionals and multitaskers?
Oh boy! How I love all these features, they do make work and life more manageable and fun. And I hope this guide helped you through multitasking on iPad. If you have any questions, queries, or hacks, feel free to share them in the comment section below. Read more:
How to use Scribble on iPadHow to use Trackpad on iPadAll the new Keyboard Shortcuts in iPadOS


![]()